前提
- VirtualBoxインストール済み
- Vagrantインストール済み
流れ
- SSH接続を立ち上げる
- Apacheのインストール
- HTML ファイルの作成
- PHP のインストール
- composerのインストール
- cakePHPのプロジェクトの立ち上げ
SSH接続を立ち上げるまで
まずBoxイメージを確認します。
$ vagrant box list

//結果
centos/7           (virtualbox, 1905.1)
coreos-alpha       (virtualbox, 983.0.0)
ubuntu/trusty64    (virtualbox, 20151104.0.0)
ubuntu/trusty64    (virtualbox, 20151110.0.0)
vccw-team/xenial64 (virtualbox, 20161209)
centos/7がない場合以下のコマンドを叩きます。
$ vagrant box add centos/7
==> box: Loading metadata for box 'centos/7'
    box: URL: https://atlas.hashicorp.com/centos/7
This box can work with multiple providers! The providers that it
can work with are listed below. Please review the list and choose
the provider you will be working with.

1) hyperv
2) libvirt
3) virtualbox
4) vmware_desktop

Enter your choice: 3
==> box: Adding box 'centos/7' (v1708.01) for provider: virtualbox
    box: Downloading: https://vagrantcloud.com/centos/boxes/7/versions/1708.01/providers/virtualbox.box
==> box: Successfully added box 'centos/7' (v1708.01) for 'virtualbox'!
次に任意のディレクトリでvagrantの初期化を行います。私はDocuments/project1に作りました。
// terminalにて
cd Documents

// Documents
mkdir project1
cd project1

// Documents/project1
vagrant init centos/7
これでVagrantfileがproject1にて作られます。Vagrantfileにて以下のように#を取り外します。
//Vagrantfile
# config.vm.network "private_network", ip: "192.168.33.10"

↓↓↓↓↓↓↓↓↓↓↓↓↓↓↓↓↓↓↓↓↓↓↓↓↓↓↓↓↓↓↓↓↓↓↓↓↓↓↓↓↓↓↓↓↓↓↓↓↓↓↓↓

config.vm.network "private_network", ip: "192.168.33.10"
// #を外すだけ
それでは起動します。
// Documents/project1
vagrant up
起動が完了したらSSH接続をします。
// Documents/project1
vagrant ssh
とりあえずSSH接続までは終わりました。
Apache のインストールなど
Permission Deniedと出てくるときの対処法
- sudo を冒頭につける
- 権限をchmodを使って移譲する(結構ここでハマりました。)
$ sudo yum install httpd
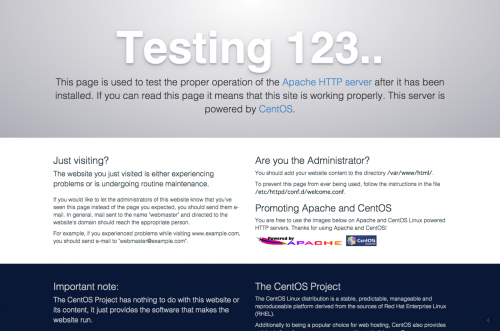
$ sudo service httpd start

[結果]
Starting httpd (via systemctl):                            [  OK  ]
#または、以下でも大丈夫
Redirecting to /bin/systemctl start httpd.service
これでIPアドレスをブラウザーに入力すると、以下のようなウェブサイトが出てきます。
それでは次にhtmlファイルを作っていきます。
HTMLファイルの作成
Apacheが見る/var/www/htmlのディレクトリにHTMLファイルを作る必要があります。 ということで移動します。
cd /var/www/html
touch index.html
# 権限がない場合は以下
sudo touch index.html
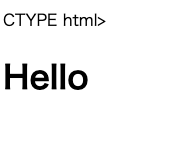
vi index.html


# 以下をindex.htmlに貼り付ける

<!DOCTYPE html>
<html>
<head>
<meta charset=utf-8>
<title>test</title>
</head>
<body>
<h1>Hello</h1>
</body>
</html>
これで以下のようにウェブサイトが更新されるはずです。
PHPのインストール
$ yum install epel-release
または
$ sudo yum install epel-release
$ rpm -Uvh http://rpms.famillecollet.com/enterprise/remi-release-[バージョン].rpm

# 自分の場合は7でダウンロードしました。
$ sudo rpm -ivh http://rpms.famillecollet.com/enterprise/remi-release-7.rpm
最後にphp71をダウンロードしました。ここらへんも調査しまくりました。。。
yum -y install httpd php71 php71-php
php.iniファイルも編集します。
$ cd /etc
$ vi php.ini

date.timezone = "Asia/Tokyo"

mbstring.language = Japanese
mbstring.internal_encoding = UTF-8
mbstring.http_input = UTF-8
mbstring.http_output = pass
mbstring.encoding_translation = On
mbstring.detect_order = auto
mbstring.substitute_charset = none
composerのインストール
composerをインストールします。composerはphp用のパッケージ管理するものだとか。
#ホームディレクトリに戻る
cd

#ホームディレクトリにて
curl -sS https://getcomposer.org/installer | php

#ダウンロードできたcomposer.pharを移動
$ mv composer.phar /usr/local/bin/composer
#または
$ sudo mv composer.phar /usr/local/bin/composer
ではここでhtmlディレクトリに戻ってcomposerをインストールします。
$ cd /var/www/html
# 権限を与えることを忘れずに!

$ composer install
cakephpのプロジェクトの立ち上げ
以下のコードでやっとcakephpのプロジェクトができます!
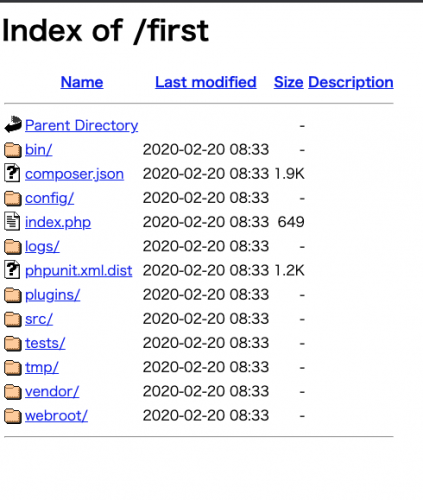
$ cd /var/www/html
$ composer create-project --prefer-dist cakephp/app [プロジェクト名]

# 自分の場合
$ composer create-project --prefer-dist cakephp/app first
IPアドレス+プロジェクトでようやくたどり着けます。
参考
Virtual box × vagrant × CakePHPの環境構築
Vagrant(CentOS7.4)で動いていたPHPが動かなくなったときの対処方法